
GPU passthrough - my switch to Linux
A few weeks ago I decided to ditch my Windows workstation and move to Linux. While Microsoft is (in my opinion) going in the right direction (WSL 2, Terminal, Package Manager) they are still very intrusive in terms of how one should use his computer (do some updates will ya?!) and privacy / telemtry data. One example for the second point that I noticed recently is, that you have to use a Micorosoft (online) account during installation. Only way around this is to cut your internet connection…
I was already using a lot of Linux at work (servers) and in my Homelab, so I am not unfamiliar with it. Only thing that hold me back to switch were games that are only running on Windows. (cause there is no better way to ruin your day than a few rounds of League w/ some friend ;) )
The most elegant way to solve the gaming problem on Linux is to use a VM and passing through your graphics card. Here I want to shortly sum up what I did to get my setup working. The resource I used the most is this Arch Linux wiki entry.
##Prerequisites I - General To pass through PCI devices there are a few hardware prerequisites. These are:
1. CPU must support hardware virtualaization and IOMMU (on Intel this is VT-x & VT-d)
2. Mainboard must support IOMMU
3. GPU (ROM) must support UEFI If you want help looking for hardware for a GPU passthrough setup you should look at [passthroughpo.st](https://passthroughpo.st/vfio-increments/).
I use a Intel i7-9700k as CPU, a ASRock z390 Pro4 as Mainboard and a NVIDIA GeForce GTX 660 as GPU. (I am aware that my GPU is really old and crappy, but it is mine and it works!) Y
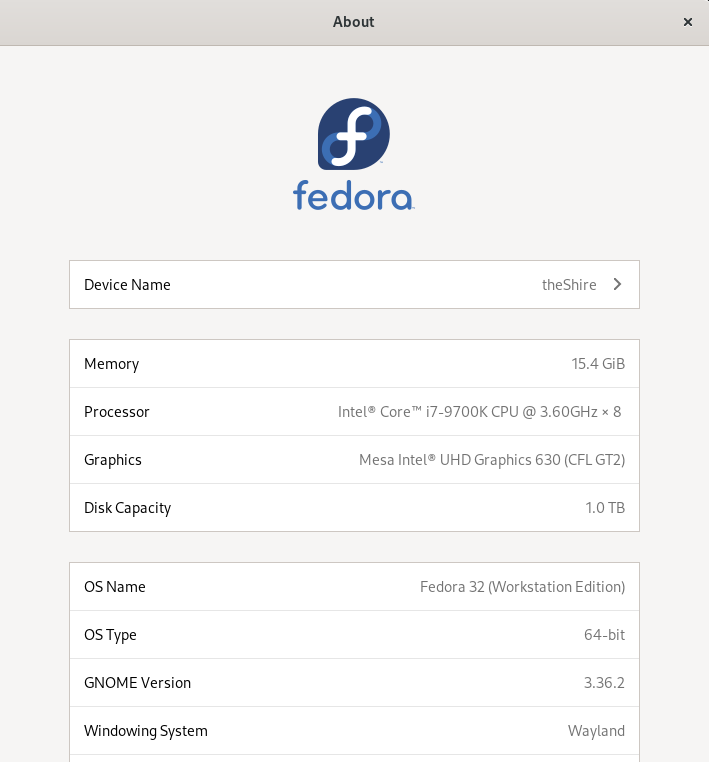

It is not really important what Linux distro you use. It should have recent software versions (e.g. QEMU & KVM). Thats why some people prefer Arch or Manajaro and have problems with Debian or Ubuntu. At the end of the day you should use the distro you like the most, because you can make the passthrough work (theoretically) on any distro. I am using Fedora 32.
##Prerquisites II - Flashing GPU Unfortunately my hardware didn’t fulfill the prerequisites, because my GPU didn’t support UEFI. (Keep in mind this baby is quite old and was released in 2012. To keep using this GPU I would need to update its VBIOS to enable it for UEFI. irst find the exact version of your card. You can use a tool like gpu-z to find it (and verify if your GPU supports UEFI in the first place). In my case the model is Asus GTX660-DC2-2GD5. I did find an official vendor (Asus) tool to update the VBIOS, but it didn’t work on my machine. The next way is to try to manually flash the ROM. (this can brick your GPU)
You can get the most up to date VBIOS for your card at techpowerup. For my graphic card, this link is the right one. For flashing I used NVFlash.
After verifying the hash of the new ROM, backing up my running ROM via GPU-Z and disabling the GPU (e.g. in Device Manager on Windows), I used following commands:
1
2
3
4
5
6
7
#list index
nvflash --list
#disable EEPROM write protection
nvflash64 --protectoff
#Flash new ROM to device at index
nvflash64 --index=*your_index* *new_ROM*
nvflash64 --protecton
After flashing I rebooted and then verified that the GPU now supports UEFI (via GPU-Z).
After fulfilling all requirements and installing Linux as host OS, the actual work on the passthrough can begin.
##Activate IOMMU & Isolate GPU As already specified at the beginning, my main source for all coming steps of this setup was the Arch Linux Wiki. My config will be specific to my hardware and to the Fedora host OS I chose.
Before being able to pass thorugh a PCI device to a VM, we have to enable IOMMU. The IOMMU will allow our hypervisor to directly address the device memory without corrupting it and without the need for the hypervisor to tranlsate it (which would be slow). A short description of IOMMU and its uses in virtualization can be found on this Wikipedia site.
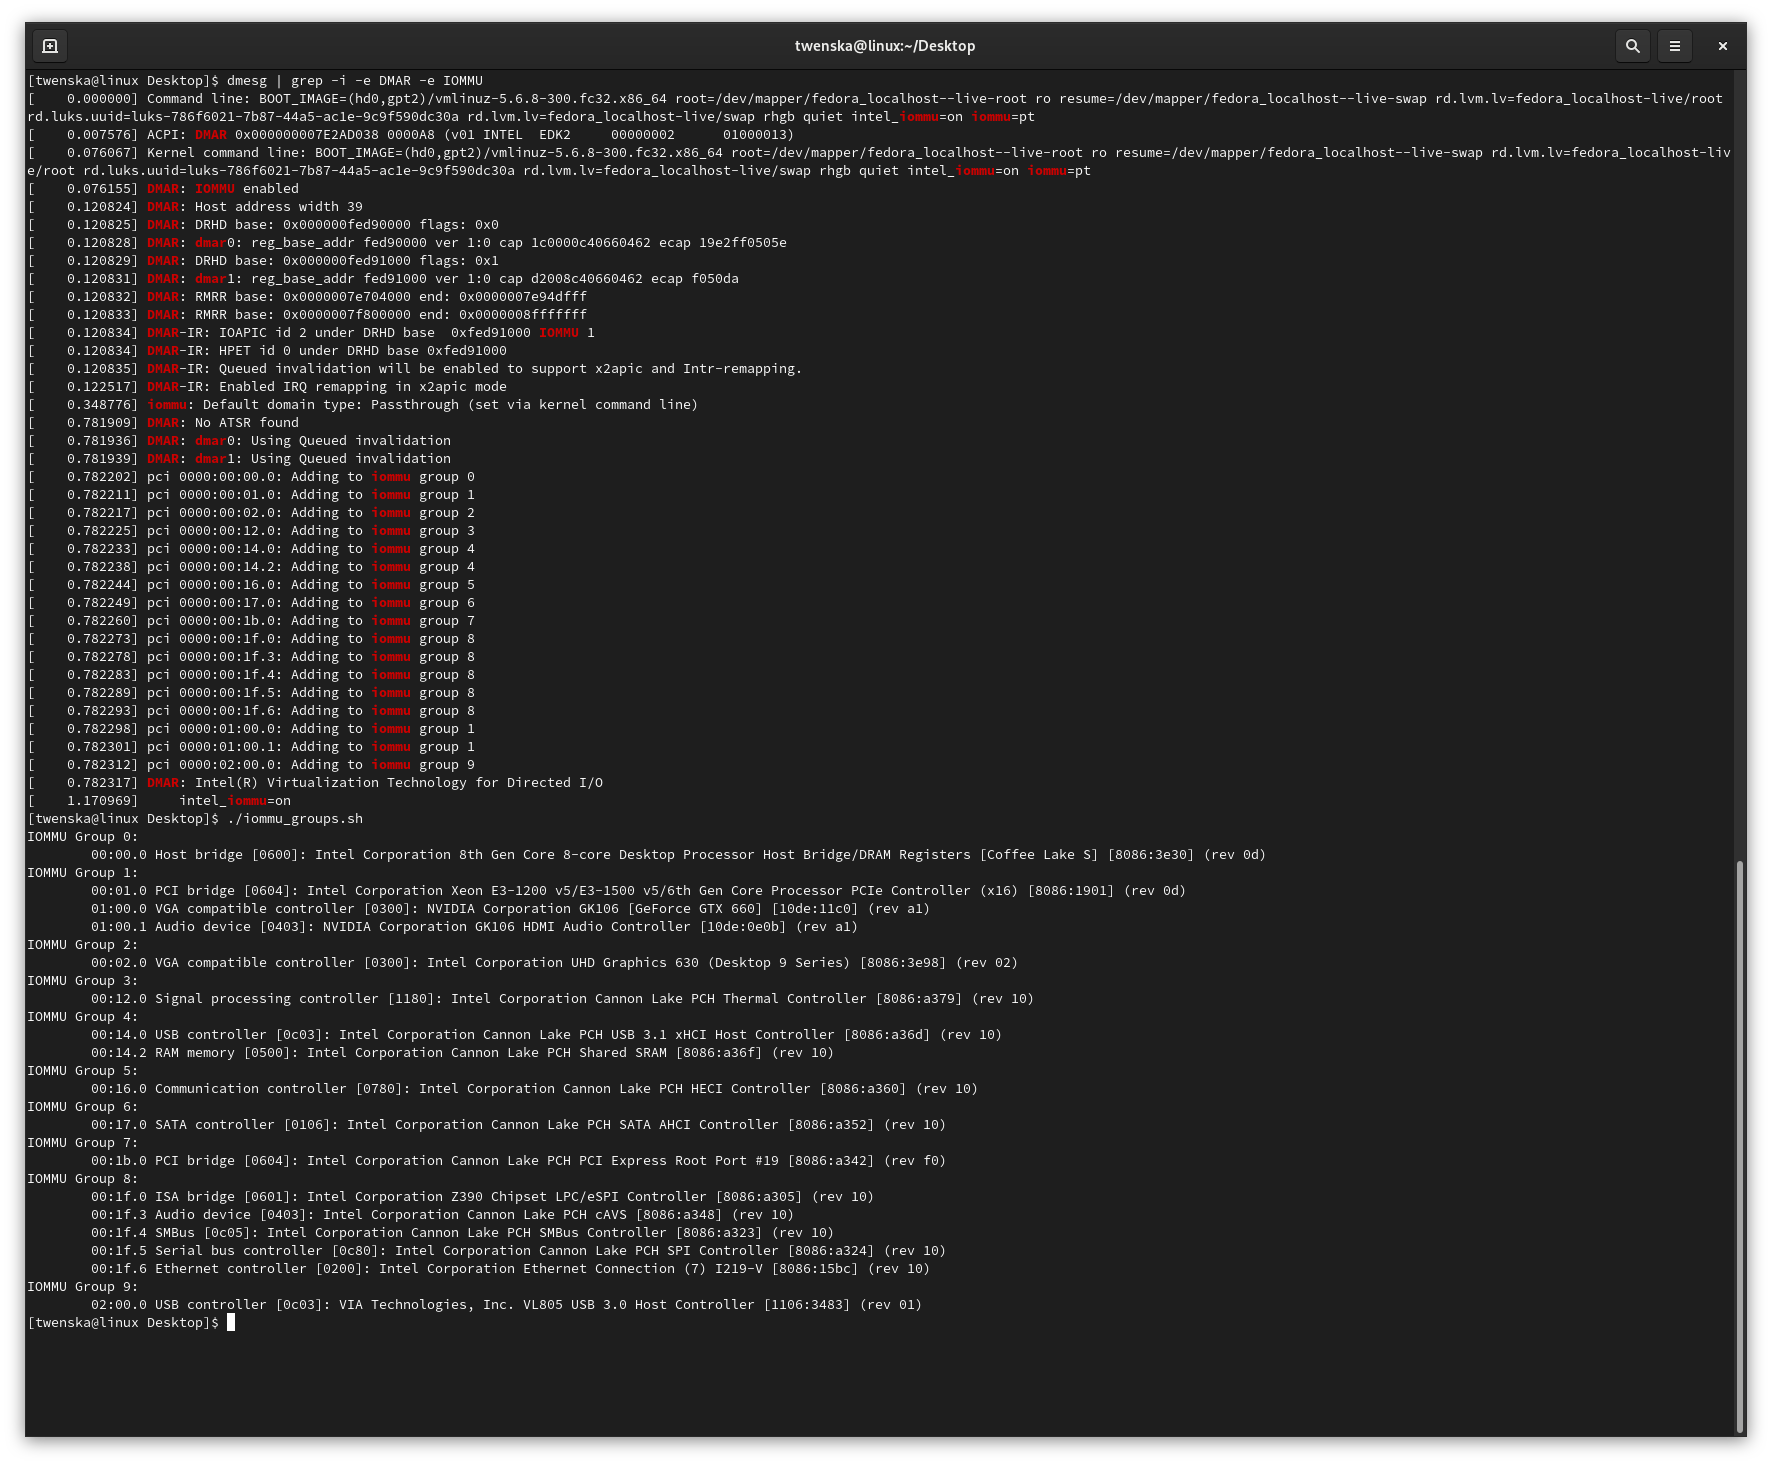
First the CPU feature must be activated in your BIOS settings. After that we need to edit the kernel parameter GRUB_CMDLINE_LINUX_DEFAULT and add intel_iommu=on to it. This should be done in /etc/default/grub, so we have to create a new GRUB config file with the command grub2-mkconfig and then reboot. After reboot check if enabling IOMMU worked with the command and script specified here. We need to note the device ids of the GPU and the attached sound device. These two should also be in one IOMMU Group. It should look something like this:
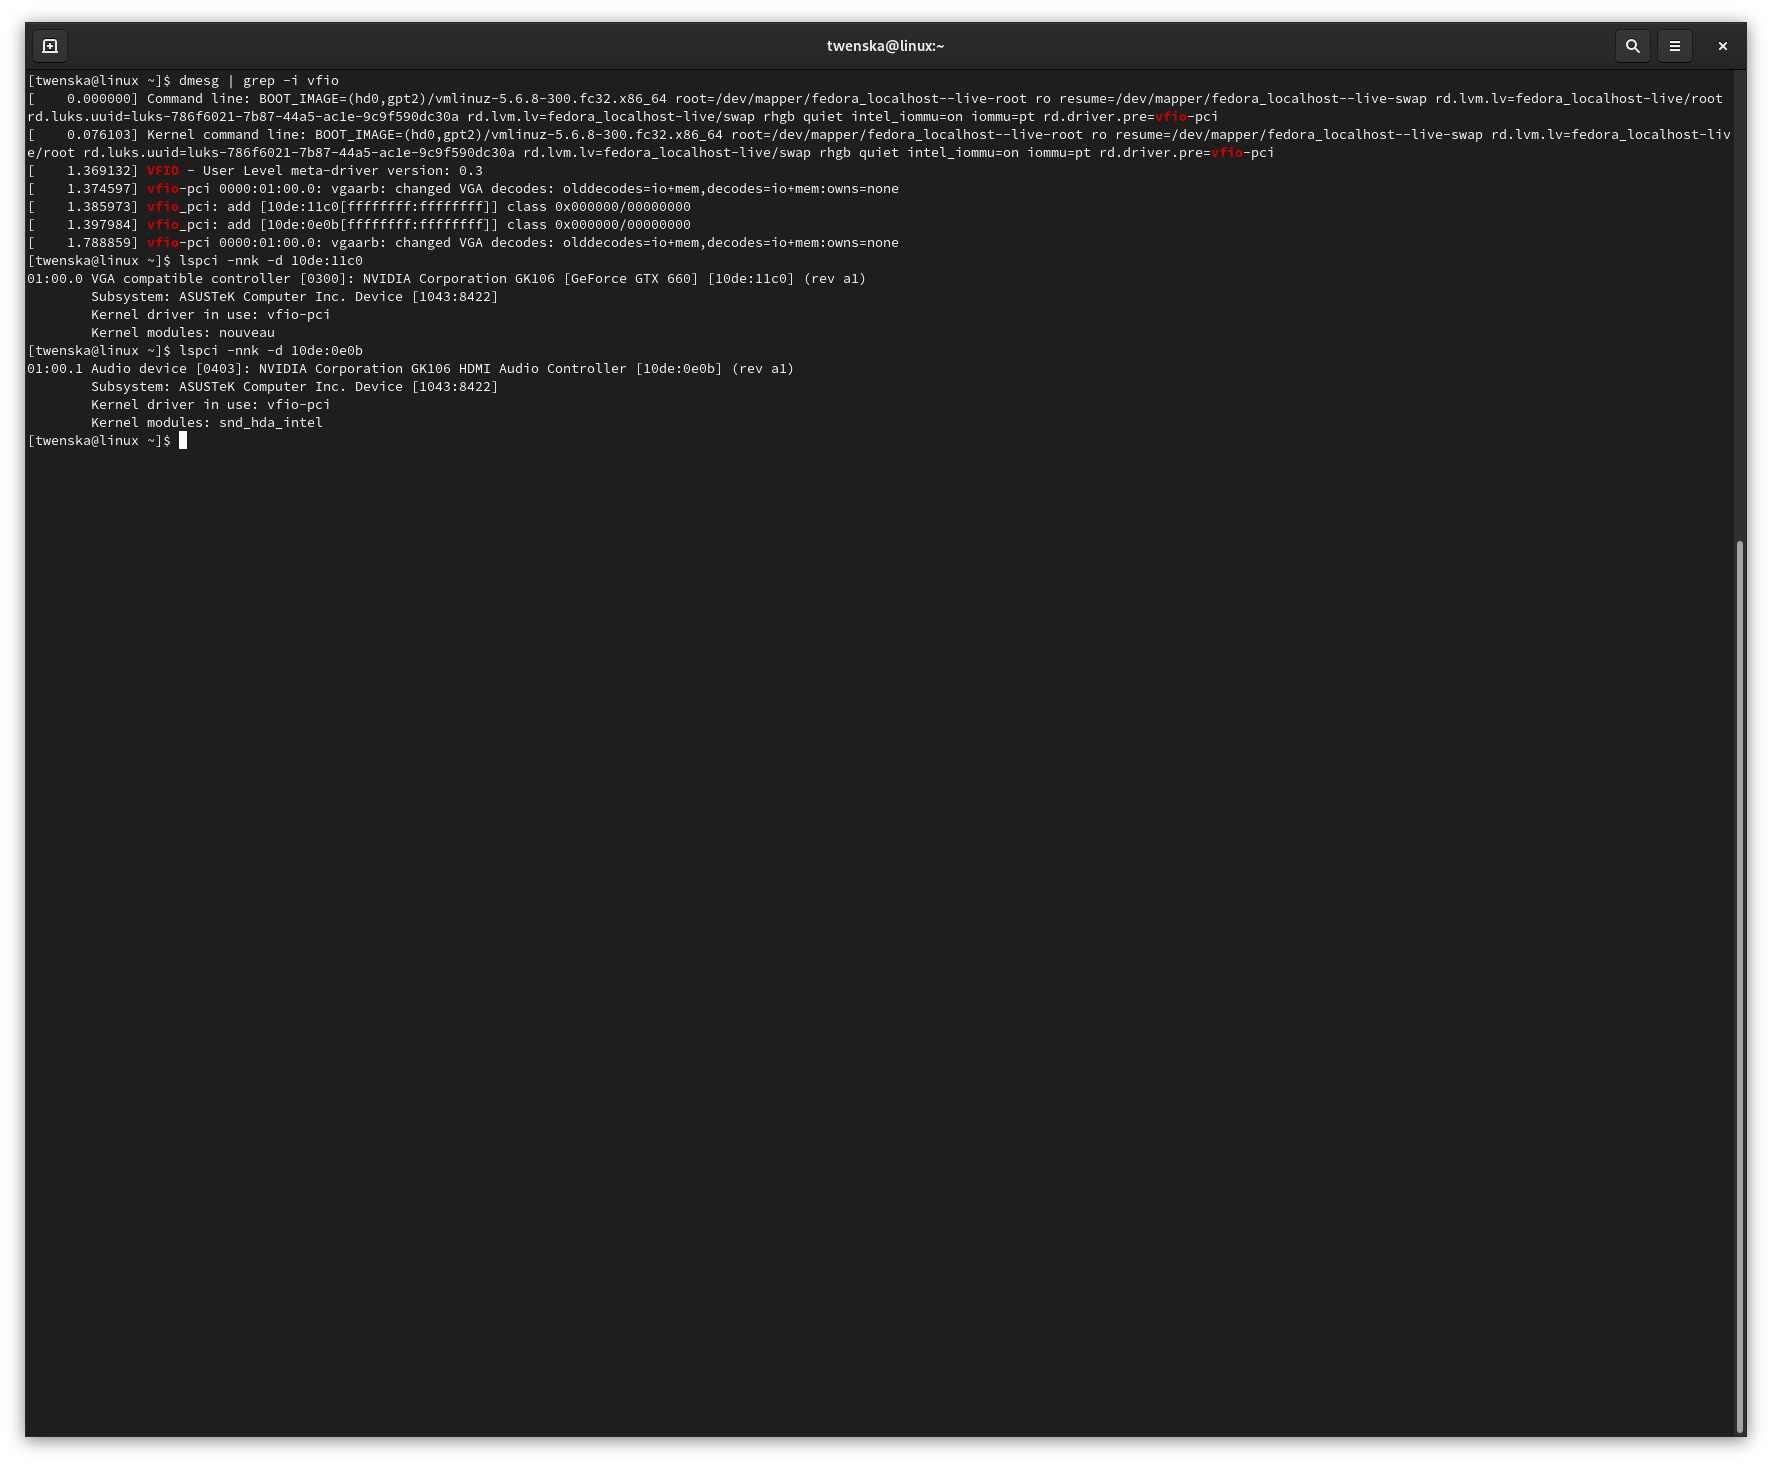
With IOMMU enabled we can isolate the GPU, so our host system won’t block it at startup. We will do this by binding the vfio-pci stub driver to the device. We shall create the file /etc/modprobe.d/vfio.conf with the content options vfio-pci ids=10de:11c0,10de:0e0b where the ids resonate to the device ids we noted earlier. Next create /etc/dracut.conf.d/vfio.conf with the content add_drivers+=”vfio vfio_iommu_type1 vfio_pci vfio_virqfd”. This specifies the drivers to attach. We should also add rd.driver.pre=vfio-pci to our kernel parameters, to make sure the driver is loaded early in the boot process. At last, recreate the GRUB config and your initramfs (w/ dracut –force –kver your_kernel_version) and reboot. You can check if the driver is succesfully bound to your GPU like this:
If this is the case, you are ready for setting up your Windows VM. ##VM Setup & Problems The VM setup with QEMU/KVM and virt-manager is really straightforward. The only change in your config before installing the VM should be to set the CPU mode to host-passthrough. After that install your Windows via the standard Spice channel and then shutdown the VM. Remove all the virtual I/O devices (Spice etc) and attach your GPU as PCI device. If you are using a NVIDIA GPU you will have to solve the Error 43 that will disable your GPU.
In my case I also got bluescreens (VIDEO TDR Failure) at every boot of the Windows VM. The libvirt logs showed the error: vfio_region_write device or resource busy. I found the solution to this problem here and wrote a script to reset my PCI root port before every VM start.
You can find my complete virtual machine config file on my Github Repo.
For passing sound from the VM to the host I use PulseAudio. To pass my peripherals I use a simple USB switch and pass a PCI-USB card to the VM. The setup works really good for playing simple Windows games (like League of Legends) on a Linux host. There is still a lot of optimization possible (new GPU, Huge MemPages, CPU Core Isolation) if I would need more performance, but for the moment I am happy with my setup :)